Irrigation Problems in Indian Gardens: What Goes Wrong and How to Fix It
If your garden looks thirsty in one spot and soggy in another, you’re probably dealing with an irrigation problem. From clogged drip lines to wrong water pressure, these issues waste water and stress plants. The good news is most of them are easy to diagnose and fix, even if you’re a weekend gardener.
Common Irrigation Issues
First, let’s list the troublemakers you’ll see most often:
- Clogged emitters or drip tape – tiny particles, sand, or mineral deposits block water flow.
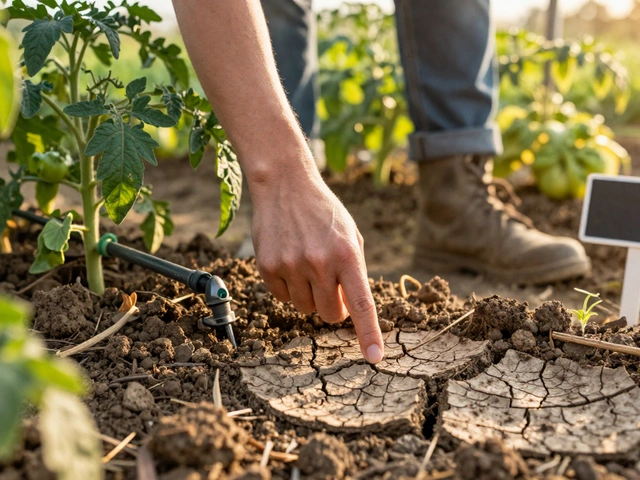
- Uneven water distribution – some beds get too much water while others stay dry.
- Wrong pressure – too high pressure shoots water out, too low leaves plants thirsty.
- Over‑watering or under‑watering – caused by wrong timer settings or no soil moisture check.
- Leaking joints or broken tubing – water disappears before it reaches the root zone.
Spotting these signs early saves you water bills and keeps your garden thriving.
Simple Solutions to Fix Them
1. Flush the system. Turn off the main valve, then reconnect a hose to the end of your drip line and run water backwards for a few minutes. This pushes out debris that’s stuck in the emitters.
2. Check pressure. Use a simple pressure gauge – most garden stores sell a cheap one. Ideal pressure for most drip systems is 10‑25 psi. If it’s higher, add a pressure regulator; if lower, check for leaks or blocked filters.
3. Clean or replace emitters. Pull out a clogged emitter, soak it in a solution of water and white vinegar for 10 minutes, then rinse. If it stays blocked, replace with a new one – they’re inexpensive.
4. Adjust timers. Set watering times based on season and plant needs. In hot Indian summers, a short 15‑20 minute early‑morning run often works better than a long evening soak.
5. Use soil moisture sensors. A cheap sensor placed in a pot or garden bed tells you when the soil is actually dry. Pair it with your timer for automatic adjustments.
6. Inspect joints and tubing. Walk the line and look for wet spots on the surface. Tighten loose fittings with a wrench, and replace any cracked tubing sections.
7. Mulch around plants. A layer of straw or dry leaves reduces evaporation, so you need less water from the system.
These steps solve 80‑90% of everyday irrigation headaches. Once you’ve got the basics covered, you can explore more advanced ideas like subsurface drip, rain‑water harvesting, or smart controllers.
Need deeper guidance? Check out our posts on drip irrigation depth, drip tape vs. drip line, and why drip systems can feel expensive. Each article breaks down the topic with clear steps and local examples, so you can pick the right solution for your garden’s size and climate.
Remember, irrigation isn’t a set‑and‑forget task. A quick weekly check saves water, cuts costs, and keeps your garden looking lush. Happy watering!

Drip Irrigation
0
Comments
Drip Irrigation: Why Isn’t Everyone Using This Efficient Watering System?
Why do so many gardeners, farmers, and homeowners skip drip irrigation, even with its proven water savings? We dig into the roadblocks, mistakes, myths, and the real challenges holding it back.
About
Drip Irrigation
Latest Posts


Permaculture Gardening: What It Means and How to Get Started
By Alden Thorne May 7, 2025

Best Houseplants for Beginners and Enthusiasts: Top Choices for Every Space
By Alden Thorne Jun 30, 2025

Indian God of Vegetables: Myth, Meaning, and Tips for Better Gardening
By Alden Thorne Apr 26, 2025