Home Composting: Simple Steps to Turn Kitchen Waste Into Garden Gold
Ever stare at a mountain of veggie peelings and wonder what to do with them? Instead of tossing them, you can turn that waste into black gold for your garden. Home composting is easy, cheap, and makes your plants healthier. Let’s break down the basics so you can start composting today.
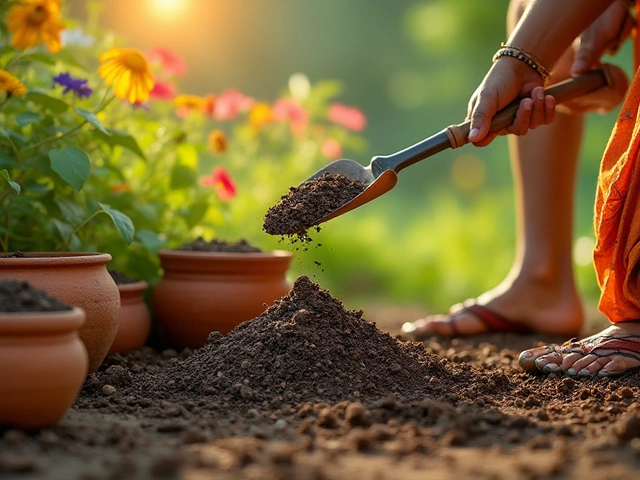
Pick the Right Spot and Bin
First, find a dry, shady corner in your yard or balcony. A spot with good airflow works best – the compost will breathe and break down faster. You don’t need a fancy tumbler; a simple wooden or wire bin with a lid will do. If you live in an apartment, a sturdy kitchen bucket with a lid and a charcoal filter can keep odors in check.
Layering: The Secret to Speedy Decomposition
Compost thrives on a balance of “greens” (wet, nitrogen‑rich scraps) and “browns” (dry, carbon‑rich material). Start with a 2‑inch layer of shredded newspaper, dry leaves, or cardboard. Then add a 2‑inch layer of kitchen waste – fruit peels, coffee grounds, and vegetable trimmings. Keep alternating these layers until the bin is full. The browns absorb excess moisture and keep the mix from getting soggy.
A quick tip: sprinkle a handful of garden soil or finished compost between layers. That introduces helpful microbes and kick‑starts the breakdown process.
What to Compost and What to Skip
Good to compost: fruit and veg scraps, coffee grounds, tea bags (without the staple), eggshells, shredded newspaper, cardboard, dry leaves, and grass clippings. Avoid meat, dairy, oily foods, and pet waste – they attract pests and smell bad. Also stay away from diseased plants or weeds that have gone to seed.
If you’re unsure, imagine whether a stray mouse would be attracted to it. If yes, skip it.
Maintenance: Turn, Moisturize, and Monitor
Every week or two, give the pile a quick turn with a garden fork or shovel. Turning aerates the mix, spreads microbes, and speeds up decomposition. The compost should feel like a damp sponge – not soggy, not bone dry. If it’s too wet, toss in more browns; if it’s too dry, spray a little water.
Watch the temperature. A hot pile (120‑160°F) means it’s working well. If it cools down, a good turn will revive the activity.
When It’s Ready and How to Use It
After about 2‑4 months, the material will turn dark, crumbly, and smell earthy. That’s finished compost – ready to boost any garden bed. Mix it into potting soil for houseplants, spread a thin layer around vegetable rows, or use it as a mulch to retain moisture.
Our "Sustainable Gardening" guide (see post #50308) dives deeper into using compost for water conservation and soil health. Pair your compost with native plants for an eco‑friendly yard that needs less water and fertilizer.
Common Mistakes and Quick Fixes
Too many greens? The pile gets slimy and smells. Add more browns and turn it faster.
Not enough moisture? Lightly mist the pile and cover it with a tarp.
Odor problems? A layer of newspaper on top and regular turning usually solve it.
Remember, composting is a learning curve. Small tweaks make a big difference.
Ready to start? Grab a bin, collect your kitchen scraps, and follow these steps. In a few months you’ll have nutrient‑rich compost that makes your garden flourish while cutting down on waste. Happy composting!

Sustainable Gardening
0
Comments
Composting Drawbacks: Real Issues, Surprising Facts, and Smart Tips
Discover the true drawbacks of composting. Detailed look at problems like pests, odor, time, and more. Learn real stats, smart hacks, and what to expect.
About
Sustainable Gardening
Latest Posts


Mastering the 30/30 Rule for Efficient Drip Irrigation
By Alden Thorne Jan 7, 2025

Ultimate Guide to Creating a Thriving Kitchen Garden
By Alden Thorne Jan 22, 2025

Discovering the Most Unhealthy Foods and Healthier Options in Vegetable Gardening India
By Alden Thorne Jan 30, 2025