Buried Drip Lines: Simple Guide to Subsurface Drip Irrigation
Ever wondered why some gardens stay green with barely any water? The secret is often a buried drip line. Unlike surface hoses, these tubes sit underground and deliver water right to the root zone. That means less evaporation, fewer weeds, and healthier plants. If you’re ready to cut water bills and boost growth, keep reading. We’ll walk through what buried drip lines are, why they work so well in Indian soils, and how to install them without hiring a pro.
Why Choose a Buried Drip Line?
First up, the benefits. Water drops straight where the roots need it, so you avoid the soggy surface that many traditional sprinklers create. In hot Indian summers, that saves a lot of moisture that would otherwise evaporate. It also reduces weed growth because the soil surface stays dry. For gardeners who grow veggies, fruit trees, or flower beds, a buried line can mean more consistent yields and fewer water‑stress problems. Plus, once it’s in place, you barely see it – no unsightly hoses to trip over.
Step‑by‑Step Installation
Here’s a quick run‑through that works for most backyard beds:
- Plan your layout: Sketch the beds, mark where each plant sits, and decide the spacing of the drip tubing. A typical spacing is 30‑45 cm for row crops and 45‑60 cm for larger shrubs.
- Choose the right tube: Look for a 16‑mm or 19‑mm polyethylene drip line rated for buried use. It should have a pressure rating of at least 3 bar.
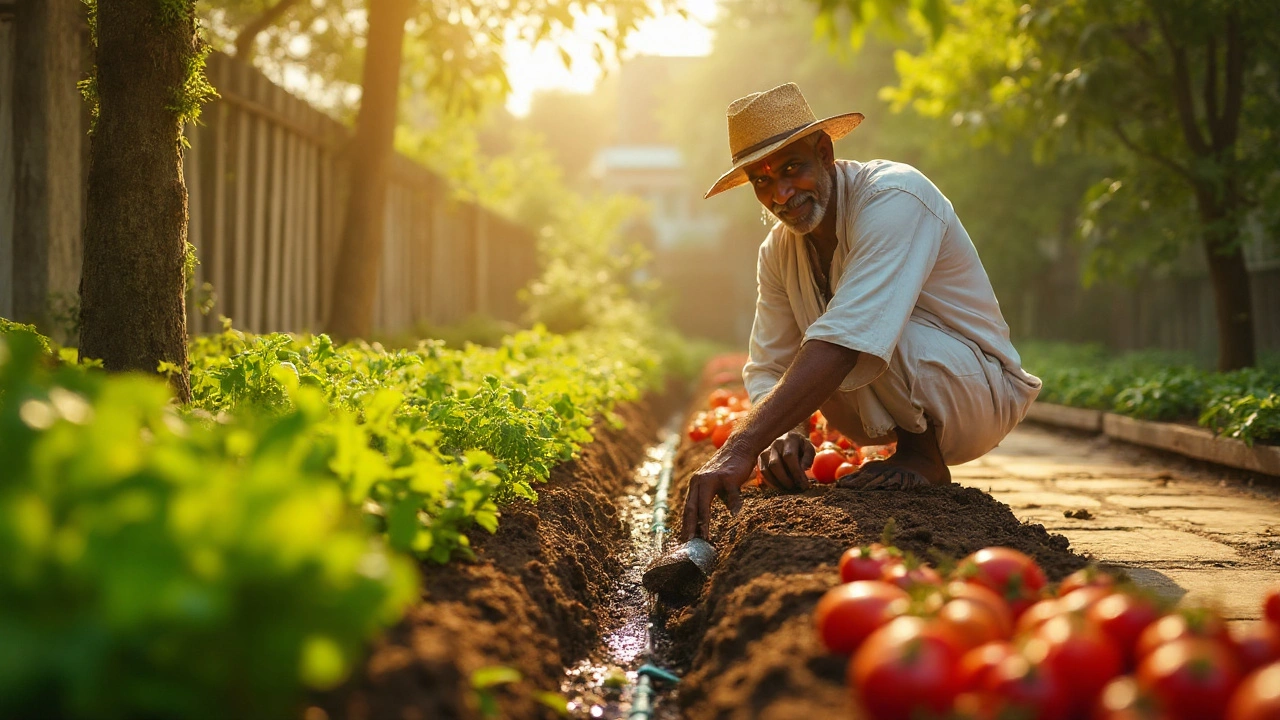
- Dig shallow trenches: Use a spade or a small trenching tool to make 15‑20 cm deep furrows along your layout. Keep the trench straight to avoid extra digging later.
- Lay the tube and add emitters: Unroll the drip line, insert pressure‑compensating emitters at each plant point, then cover with soil. Push the soil gently to avoid crushing the emitters.
- Connect to a timer: Hook the line up to a low‑pressure pump or a timer with a pressure regulator. Set it to water early morning or late evening to match plant needs.
After the first run, monitor the soil moisture for a few days. If you see dry spots, adjust the emitter flow or add a few more emitters. A quick check with a soil probe or a simple finger test will tell you if the water is reaching the roots.
Maintenance is easy. Flush the line once a month by opening the end taps and running water at high pressure for a minute. This clears any blockages from chalk or fine debris, a common issue in hard water areas.
That’s it – a buried drip line can be set up in a weekend and start saving water right away. With the right layout and a bit of care, your garden will stay lush even when the monsoon is far away.
Drip Irrigation
0
Comments
How Deep Should Drip Irrigation Lines Be Buried? Guide for Optimal Water Delivery
Learn the right burial depth for drip irrigation lines, factors that affect it, and step‑by‑step installation tips for healthy gardens.
About
Drip Irrigation
Latest Posts

How to Make Bad Dirt Good: Simple Fixes for Tired Garden Soil
By Alden Thorne May 11, 2025
Essential Terrace Protection Techniques for Thriving Gardens
By Alden Thorne Jan 2, 2025

Best Orientation for Your Kitchen Garden: Maximize Sunlight and Growth Success
By Alden Thorne Feb 20, 2025