If you've ever found yourself tangled in hoses or battling with a sprinkler, you might wonder if there's a better way to water your garden. Enter drip irrigation—a game-changer for efficient watering. It's like an underground network that delivers water right where plants need it, with hardly any waste. Sounds pretty good, right?
Before you start digging, let's talk about the basics. You might be asking, 'Can I really do this myself?' Absolutely, with a little patience and the right tools. The beauty of drip irrigation is that it's scalable to your needs, whether you've got a tiny balcony herb garden or a sprawling backyard plot.
So what do you need to get started? You'll require some basic items: tubing, emitters, connectors, and a few tools you probably already have in your garage. The goal here isn't just to set it up but to do it in a way that maximizes efficiency and minimizes water loss.
- Why Choose Drip Irrigation?
- Basic Tools and Materials
- Planning the Layout
- Step-by-Step Installation
- Tips for Maintenance and Troubleshooting
Why Choose Drip Irrigation?
Drip irrigation is like the secret weapon for gardeners and farmers who want efficient watering without the hassle. So, what's the big deal? For starters, it's about efficient irrigation. This system targets the roots directly, meaning less water wasted and happier plants.
Think of it like this—while traditional sprinklers spray water everywhere, drip systems get right to the point. This means you're not soaking weed-riddled paths or walkways. Drip irrigation systems can use up to 50% less water than conventional systems. That's a huge plus for both your wallet and the planet.
Benefits of Drip Irrigation
- Water efficiency: By targeting root zones, you're essentially giving plants what they crave without drowning them.
- Reduced evaporation: Since water drips directly to the soil, you avoid the pitfalls of evaporation and run-off.
- Saves time and energy: Set it up and let it do its thing. No more lugging hoses or timing a sprinkler dance.
Did You Know?
A surprising fact is that drip irrigation can reduce plant disease. When foliage stays dry, there's less chance for mold and fungal issues to develop. It's like giving plants their best shot at a healthy life.
Environmental and Economic Impact
With drip irrigation, not only are you conserving water, but you’re also investing in a method that aligns with sustainable practices. This can be especially important in areas prone to drought or with strict water usage regulations. Plus, lower water bills don't hurt!
Here's a quick glance at how much water you can save:
| Irrigation Type | Water Use Reduction |
|---|---|
| Drip Irrigation | Up to 50% |
| Sprinklers | 15-35% |
Switching to a drip system might just be a smart move for both your plants and your pocket.
Basic Tools and Materials
Alright, let's get down to the nuts and bolts of this project. Setting up a drip irrigation system isn't just about planting some tubes and calling it a day. Having the right tools and materials can make the difference between a smooth DIY project and a frustrating afternoon.
Essential Tools You'll Need
Before you roll up your sleeves, make sure you've got these basics covered:
- Drip Tubing Cutter: This tool makes cutting the tubing a breeze. Using a sharp cutter ensures you have clean cuts without squishing the tubing.
- Hole Punch Tool: You've got to make precise holes for the emitters, and a specialized punch tool is perfect for this job.
- Garden Stakes: These help to keep the tubing in place, especially in windy areas or on slopes.
- Pressure Regulator: Keeps water pressure in check so you don’t blow out your emitters. You'll want a regulator that matches your home's water system.
Key Materials You Can't Skip
Got your tools? Great, now gather these materials:
- Drip Tubing: This is the backbone of the system, usually a black polyethylene tube. Diameter varies, but 1/2-inch is standard for most yard sizes.
- Emitters: These are the small devices that release water to your plants. Choose ones that suit your plant type—flowers might need less than veggies.
- Connectors and Ends: Used to link tubes, these pieces ensure everything sticks together. You'll use elbows, tees, and end closures depending on your layout.
- Filter: Don't skip this. It prevents dirt and debris clogging the system.
Optional Items for Efficiency
Consider these if you're looking for a bit more control:
- Timer: Saves you time and makes sure your garden’s watered even when you forget.
- Backflow Preventer: Stops water from flowing back into your home’s supply, which is critical for safety.
With this gear in your toolbox, you’re pretty much set to give your garden watering the upgrade it deserves. Just keep in mind that starting small is okay—especially if you're learning as you go.
Planning the Layout
Let's dive into the nuts and bolts of setting up your drip irrigation system. Good planning is key, and it starts with mapping out your garden. You'll want to have a rough idea of where your plants are and how they're arranged. This way, you can optimize where to lay your tubes and place your emitters for the best water delivery.
Sketching Your Garden
Start by sketching a simple map of your garden area. Don’t worry about getting a perfect artwork, it’s just to visualize your layout. Note down the location of the plants: are they in rows, in clumps, or scattered? Knowing this helps in determining where the main tubing should go.
Determining Watering Zones
Another thing to consider is that different plants have different water needs. Group plants with similar watering requirements together to create watering zones. This allows you to control the amount of water each zone gets, which is especially useful if your garden includes veggies, flowers, and shrubs all in the same space.
Calculating Tubing Length
Measure the distance from your water source to the furthest point of your garden. This will help you calculate how much tubing you'll need. Don’t forget to account for the layout of the tubes running to and between plants. It’s often smart to add a bit extra to your estimate to cover any mistakes.
Selecting Emitters
When it comes to emitters, choose them based on the plant types and their water requirements. For a vegetable patch, 1-gallon per hour emitters are generally a good pick. For more water-intensive plants, 2-gallon per hour might be more suitable. Adjust according to your layout and needs.
Helpful Stats
For those who love crunching numbers, consider this: a well-planned drip irrigation system can save between 20-50% more water compared to traditional watering methods. This not only cuts down on your utility bills but also reduces run-off and evaporation, making your gardening efforts more sustainable.
Having a solid plan can make a world of difference when you start the actual installation. Taking the time now to think through your DIY installation can save you frustration—and plants—later on.
Step-by-Step Installation
Ready to dive into the installation? Let's break it down into simple steps, so you'll have your drip irrigation system up and running without unnecessary hassle.
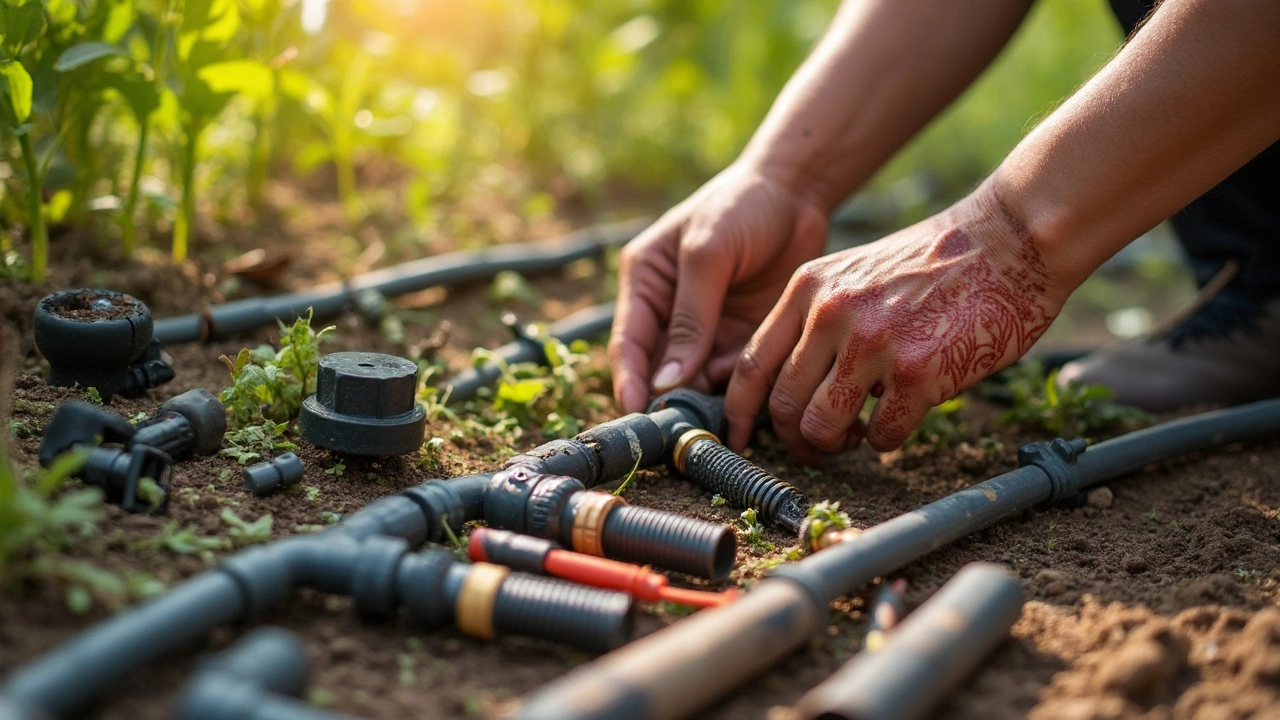
Gather Your Supplies
Before you jump in, make sure you've got all your gear lined up. Grab the tubing, emitters, connectors, stakes, a backflow preventer, and a pressure regulator. A pair of scissors and a punch tool will come in handy too.
Connect to Water Source
Start at your hose bib or outdoor faucet. Attach your backflow preventer first—this is crucial for preventing contaminated water from flowing back into your main water supply. Next, attach the pressure regulator followed by a filter to catch any debris. Finally, connect the tubing adapter.
Lay Out the Tubing
Unroll your tubing and lay it out around your garden. Consider a route that minimizes sharp turns to maintain water flow efficiency. If it feels like solving a puzzle, you're doing it right!
Cut and Secure Tubing
Once you're happy with the layout, cut the tubing to fit your design using scissors. Secure the tubing to the ground using stakes, especially around curves and ends, to keep everything in place.
Punch Holes for Emitters
This is where the magic happens. Use a punch tool to create holes in the tubing where your plants are. Insert emitters into these holes. Remember, spacing depends on your plants' watering needs. For example, veggies might need closer spacing than drought-resistant shrubs.
Connect Everything Up
Use connectors for any T-junctions or corners. This ensures a tight fit and prevents leaks. Cap the ends of your tubing to maintain pressure. You're almost there!
Test the System
Time for the moment of truth! Turn on the water and watch your drip irrigation in action. Adjust emitters and check for leaks. Small adjustments here can make a big difference.
Setting up a DIY drip irrigation system can seem daunting, but following these steps saves you time in the long run. Not only will your plants thank you, but you'll also see a dip in water usage—good for your wallet and the environment!
Tips for Maintenance and Troubleshooting
Keeping your drip irrigation system in top shape isn't rocket science, but it does require a bit of know-how. The goal is to ensure everything runs smoothly so your plants get the right amount of water, and we prevent any surprises.
Regular Checks and Cleaning
First things first, regular maintenance is crucial. At least once a month, inspect the system for leaks or blockages. These are common issues that can happen over time due to debris or natural wear and tear.
To clean the system, flush it with water. You might need to remove emitters and allow water to flow freely to wash away any blockages. Use a soft brush or something similar to scrub emitters if they appear clogged.
Monitoring Water Pressure
Pressure balance plays a big role in effective irrigation. Too much pressure can blow fittings apart, too little and the water won't reach all plants. Invest in a pressure regulator if you find uneven watering. It's a small device that can make a big difference.
Winterizing Your System
If you live in an area where temperatures drop below freezing, don't forget to winterize your setup. Drain all water from the system to prevent pipes from cracking. You can leave the lines in place, but storing the more delicate parts inside for winter might save you a headache come spring.
Handling Minor Issues
Let's face it, issues will crop up. Here's a quick troubleshooting guide:
- If a section isn't receiving water, check for kinks in the tubing or open emitters that might have been accidentally closed.
- A sudden drop in pressure? Check the main filter—it might need cleaning.
- Uneven watering could mean the emitters are clogged. Give them a look and clean as needed.
By staying on top of these small fixes, your DIY installation will keep your garden happy and healthy throughout the growing season. Remember, it's all about spotting issues early and dealing with them before they become big problems.
Data on Common Issues
| Issue | Frequency (%) |
|---|---|
| Clogged Emitters | 35% |
| Leaks in Tubing | 25% |
| Pressure Issues | 20% |
So, keep an eye on these common problems, and your efficient irrigation system will serve you well, saving water and time.