Quick Summary
Removing the top layer of soil is essential for new lawns, vegetable beds, or leveling a yard. While many people reach for a standard spade first, the most efficient tool depends on your area size and soil type. A mechanical sod cutter is best for large lawns, saving hours of back-breaking labor. For smaller patches, a sharp border spade or a specialized turfcutter blade works well. Always check soil moisture before cutting to avoid clumps. Disposal options include council green waste services or composting, depending on what you are uncovering.
The Truth About Stripping Topsoil
You are probably standing in a patch of dirt that refuses to look like a garden. Maybe you want to kill a stubborn weed root system, maybe the grade is uneven, or maybe you just want a fresh start on your landscaping project. Removing the top layer of soil sounds easy until you try doing it with a dull knife-sharpener and a cheap hand digger. It turns into an endless war against the earth.
Most people guess at the right gear without knowing why certain tools fail. Using a blunt hoe on compacted clay in Auckland, for instance, will ruin your wrist before you clear three square meters. The reality is that the "right" tool isn't just about strength; it is about geometry and leverage. You need something that slices rather than tears, especially when dealing with turf-grass matting together.
When we talk about removing the top layer, we usually mean stripping the Turf Sod, which includes the grass blades and the living root network sitting atop the subsoil. If you skip this step, weeds will eventually choke whatever you plant next. But before you run out to buy equipment, let us look at exactly what does the job best so you do not waste money on a gadget you only use once.
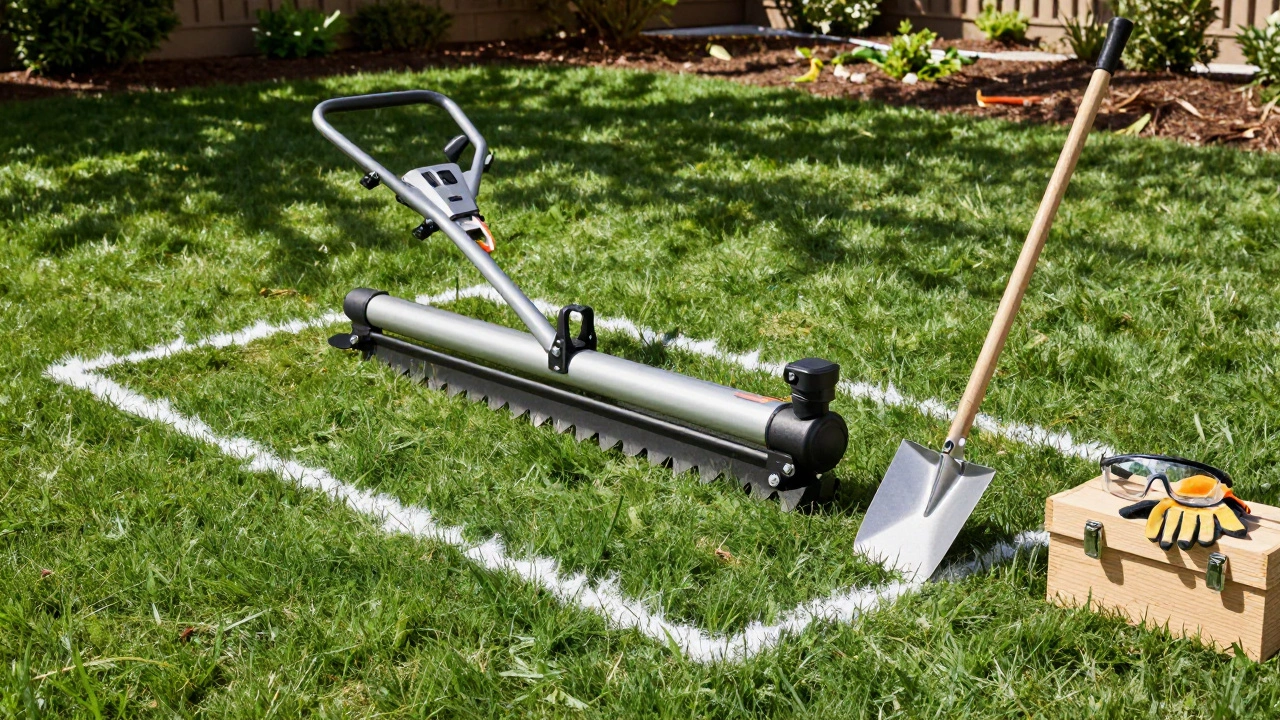
The Powerhouse: Sod Cutters
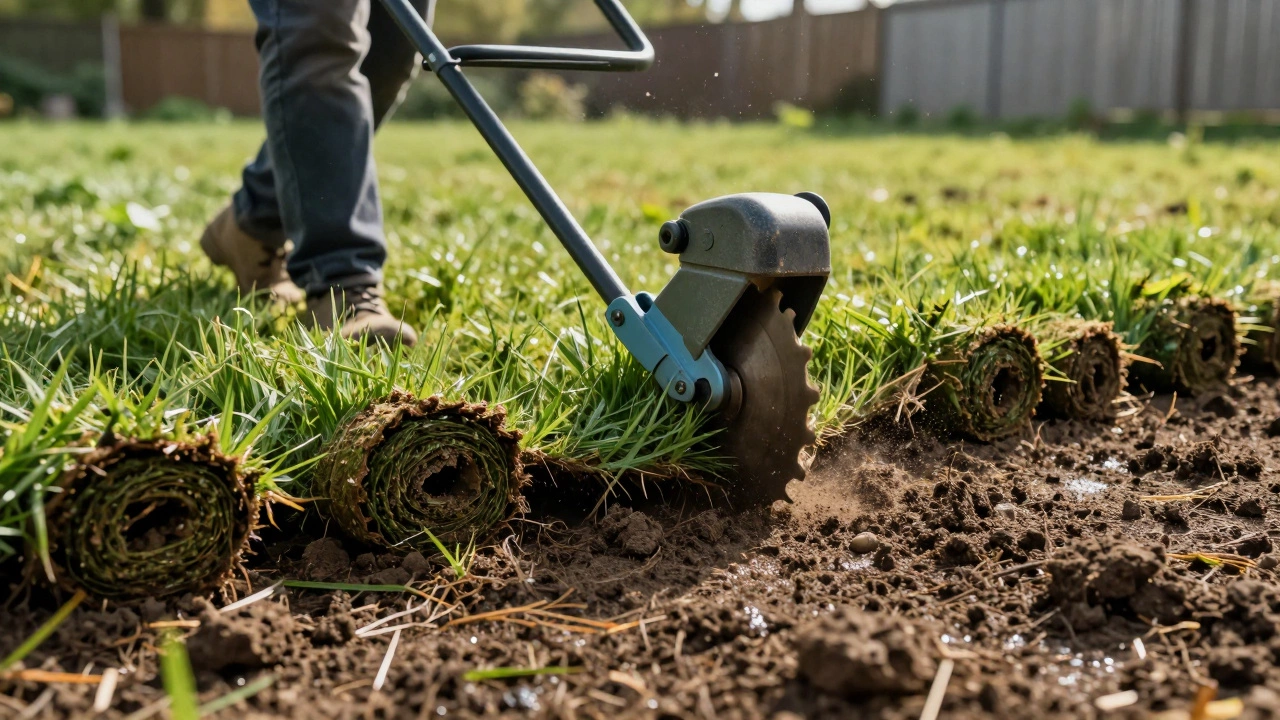
If you have more than fifty square meters to clear, manual digging is a bad idea. This is where a dedicated machine changes everything. We call this machine a Sod Cuttera power tool designed specifically to slice beneath the surface of turf and remove strips of grass. These machines usually come in two flavors: walk-behind models with wheels you push, or ride-on versions for massive estates. For a regular backyard, the walk-behind gas model or electric cordless version is the sweet spot.
Here is why this tool wins. It has a horizontal rotating drum with circular blades hidden underneath. As you push it forward, those blades spin and slice horizontally through the soil at a precise depth setting, typically between one to five centimeters. This cuts the roots cleanly from the ground below. Instead of ripping chunks of dirt that leave holes in your new level, it produces perfect rectangular rolls of turf that you can stack easily.
There are trade-offs. Rental costs add up if you need a machine for less than half a day. Gas engines require mixing fuel, which is messy. Electric versions are cleaner but limit your range by cord length unless you buy high-end battery models. Despite these minor annoyances, the time saved is immense. One person can strip a full-sized suburban lot in under three hours. Without a machine, that same job could take a weekend and result in lower back injury.
Manual Alternatives for Small Patches
Sometimes renting a heavy machine feels like overkill. Maybe you just have a narrow path, a flower bed extension, or a corner near the driveway where machinery cannot fit. In these cases, switching to manual tools gives you precision control. However, you cannot just grab any shovel. A flat-blade shovel digs, but it drags. A pointed shovel pokes. You need a specific geometry.
The best handheld option here is the Border Spadea short-handled, straight-edged digging tool ideal for edging and lifting turf. Unlike a standard garden spade, the handle sits closer to the edge of the blade. This lets you stand close to your work and lean your body weight directly onto the cutting edge. It acts like a lever, popping the turf slab up intact.
If you find yourself struggling with dense roots, such as old Kikuyu or Couch grass common here in New Zealand, you might also consider a specialized trenching spade. It is narrower and allows for sharper cuts. Another trick involves using a sturdy garden fork to pry apart the mat of roots once the edges are severed. Forks preserve the soil structure better than shovels because they do not sever the deeper earth. Combine the two: slice with the spade, lift with the fork.
| Tool Type | Best Use Case | Labor Intensity | Cost Factor |
|---|---|---|---|
| Sod Cutter (Power) | Large lawns, even surfaces | Low (push effort only) | Rental ($100-$200/day) |
| Border Spade | Small paths, irregular shapes | High (repetitive chopping) | Budget-friendly (Buy once) |
| Garden Shovel | Loose soil, no turf | Moderate | Very Low |
| Dethatcher Machine | Thatch layers, light debris | Moderate | Moderate |
Note the table above shows the differences clearly. The dethatcher is mentioned because many beginners confuse it with a sod cutter. A dethatcher rakes out dead organic matter. A sod cutter slices and removes the whole carpet. Do not mix them up or you will shred your grass without ever getting rid of it.
Preparation Before You Dig
Before you even touch the soil, preparation dictates success. If you try to cut wet mud, the blades will clog, and the turf will become a slimy mess that sticks to everything. Wait for dry weather. If the ground is too hard, water it lightly two days prior. You want firm, moist earth-not soggy and not dust-dry.
You also need to define your boundaries clearly. Walk around the perimeter with a spray paint marker or string lines. This prevents jagged edges later. Once marked, clear any stones, twigs, or hidden obstacles. Hitting a rock with a spinning sod cutter blade damages the tool instantly and can throw shards. Check underground utility lines before starting deep excavation.
The Step-by-Step Execution
Now comes the execution phase. Whether you rented the machine or grabbed your spade, the technique remains similar in concept.
- Set the Depth: Adjust your tool blade so it slices just below the visible grass line, usually about 2cm into the dirt. Too shallow leaves roots behind; too deep ruins the subsoil drainage layer.
- Work in Passes: Start parallel to a fence or wall. Move in straight lines. Overlap each pass slightly to ensure no missed strips remain.
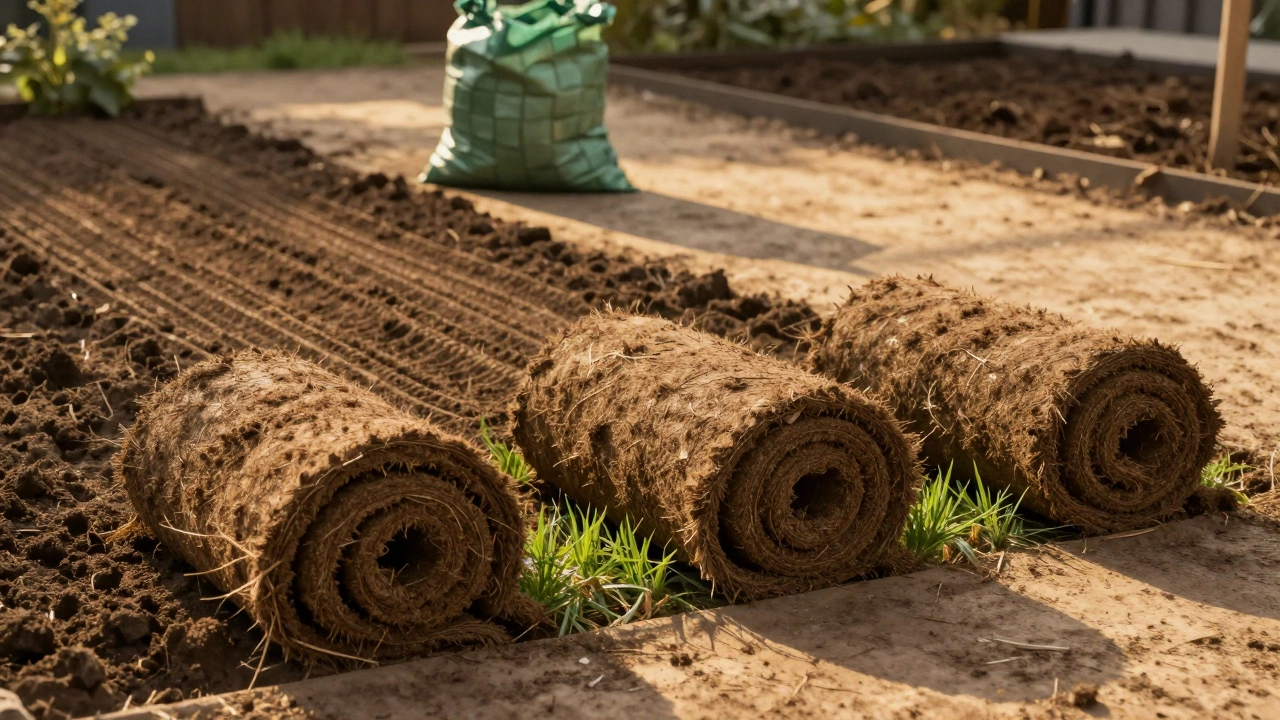
- Pile Immediately: Roll or shovel the strips into manageable piles near the property edge. Do not spread them out to dry yet.
- Invert Piles: Turn the rolls upside down if you plan to discard them quickly to stop rooting.
- Clean Up Residue: Sweep the exposed ground with a metal bow rake. You are hunting for loose clods of dirt left behind.
This systematic approach ensures the final base looks smooth. Skipping the clean-up step means planting into uneven ground, which causes water pooling spots during winter storms.
Managing the Debris
You now have a mountain of green waste. What is the protocol for disposal in our region? Simply dumping it on neighbors' property is illegal and bad karma. Composting is great, but fresh turf contains strong allelopathic chemicals that inhibit growth in other plants if piled too thickly. The nitrogen spike creates heat that kills beneficial bacteria.
The safest bet for most home gardens is taking the material to the transfer station. Many councils offer bulk green waste collection on specific days. Alternatively, you can chop up the turf and bury it deep in your compost bin as a "green" layer, covered by browns like cardboard or dry leaves to balance the carbon-to-nitrogen ratio. Never leave thick mats of grass on top of active compost piles or the smell will attract pests.
Maintenance and Safety Gear
Working with soil removal equipment requires protection. Dust, flying stones, and noise are constant hazards. Wear impact-rated safety glasses. Even a small rock chipped off a blade can cause eye damage. Ear protection is mandatory with gas-powered units. Sturdy boots protect your feet from slipping into trenches you created accidentally.
Maintaining your tools matters for longevity. Keep cutting blades sharpened. Grease moving parts of rented equipment after cleaning it to prevent rust. Clean mud off tracks immediately after work. Rusty gears seize up within a week. Proper care means you can reuse the equipment years later or return it in good condition for a deposit refund.
Can I use a regular garden hoe to remove topsoil?
A garden hoe is effective for scraping thin weeds but terrible for removing entire turf layers. It tears the soil rather than slicing it, leaving jagged edges and broken root systems that continue to grow back.
Is renting a sod cutter worth the cost?
If your area is larger than 40 square meters, yes. The rental cost averages $150, which pays for itself in labor savings compared to buying expensive manual tools or hiring professionals.
How deep should I cut the soil?
Aim for about 2 to 5 cm deep. Cutting deeper disturbs the nutrient-rich subsoil unnecessarily and makes leveling difficult later.
Will the grass grow back after removal?
It depends. If you remove all roots properly, it won't regrow. However, creeping grasses like Couch can resprout from nodes left behind in the subsoil, requiring herbicide treatment later.
What is the difference between dethatching and sod cutting?
Dethatching removes dead organic fiber buildup from the top. Sod cutting physically removes the living grass and its top root zone completely. They serve different purposes entirely.