Look, every gardener chasing healthy crops, less wastage, and sanity-saving efficiency has come face to face with the big debate: drip tape or drip line—is one actually better, or is it all just marketing hype? Picture trying to set up your irrigation only to stand in the hardware aisle doom-scrolling through forums, farmers bickering, and specs that sound like code. Here's the truth—there is a difference, and it can make or break your results. Whether you’ve got a thousand tomato plants or just a backyard bed, understanding what you’re getting into keeps the midsummer nightmares (like clogged emitters and wilting vines) at bay.
What Sets Drip Tape and Drip Line Apart?
These two sound so similar it’s easy to think they’re interchangeable. Trust me, the details matter, especially when you walk into your local ag supply shop or start piecing together a new garden plan. Drip tape is exactly what it sounds like: a flat, thin, flexible plastic tube that fills out and rounds off when water runs through it. The main point of drip tape is affordability and speed. It’s a favorite in the farming world for row crops—think lettuce, carrots, and cucumbers lined up in military order. Farmers can lay out hundreds of meters in the time it takes your neighbor to unravel a single garden hose.
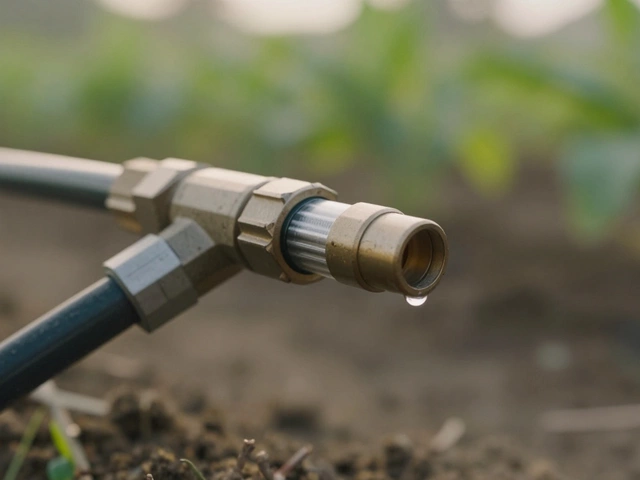
Drip line is beefier: think round, sturdy polyethylene tubing, thicker walls, and pressure-compensating emitters embedded directly in the line. This makes them able to keep a steady flow even when your terrain starts throwing you hills and dips. Where drip tape works best on even ground in short-term seasonal beds, drip line is the long-haul option. Want evidence? In a 2024 North Carolina State study, commercial strawberry growers reported a 19% reduction in water use over two years using drip lines versus tapes, mainly due to fewer repairs and less replacement.
Here’s a quick look at how they stack up:
| Feature | Drip Tape | Drip Line |
|---|---|---|
| Wall thickness | Thin (0.15–0.40mm) | Thicker (up to 1.2mm) |
| Durability | Seasonal (1–3 years max) | Multi-year (5–10 years common) |
| Cost | Low upfront, more frequent replacement | Higher upfront, less maintenance |
| Best Use | Flat, annual cropland | Perennials, containers, sloped sites |
| Clog Resistance | Medium, depends on water filtration | High, pressure compensating |
| Repair Ease | Tricky, limited | Easy, standard fittings available |
| Row Length | Up to 400 meters (under ideal pressure) | Up to 300 meters (consistent flow on slopes) |
If you’re after super low upfront cost and plan to move things each year (or rip everything out for a different crop), it’s hard to walk past drip tape. Got an orchard, vineyard, or permanent raised beds? The rugged life of drip line makes it a smarter pick. You also avoid the most common complaint from drip tape users: torn lines from even a modest row of weeds or a casual rake left in the sun.

Real-World Performance: When Each Shines (or Fails)
Let’s dig into how each choice actually performs out in the wild—not just in the brochure photos where everything is new and spotless. You’ve probably seen a few old tapes in fields, ends gnawed by rodents or missing sections where the tape folded over under the sun and pressure. This is the dark side—they’re meant for cheap, fast deployment and once you’ve run a tractor, mower, or heavy boots over them you’ll see why most growers buy extra rolls. For specialty farms running spinach or beets, replacing tape each year is (unfortunately) just the way it’s done. That’s why tape sales are still booming, especially in the California Central Valley and the Indian Punjab, where water delivery is everything.
But drip tape works. You can run it at very low pressures (as low as 6 psi), so it pairs well with gravity-fed tanks where pumps aren’t an option. For backyard growers, this makes it perfect for quick seasonal beds or raised boxes with annuals. The catch: It hates kinks. Every sharp turn is a weak spot, and leaks are almost guaranteed if you’re not gentle with the install. Pro tip? Lay it out warmed by the sun for smoother installation. Don’t even think about using it for permanent hedges or lawns—nature will chew you up over time.
Switch gears to drip line. This is where longevity shines. The round, thick-walled tube coupled with pressure-compensating emitters means you can snake it around trees, bend it through perennials, and forget about it for five years (sometimes longer, if mice don’t get curious). It also lets you dial in exact spacing and flow rates, which, honestly, every control freak gardener loves. A small home orchard in Oregon switched to 16mm drip line with 2-liter/hour emitters and saw tree loss from drought drop by 30% in just two seasons, just by evening out water delivery despite uneven ground.
Of course, nothing is invincible. Drip line can be more expensive up front, especially if you need specialty fittings or have complex layouts. But if you calculate the cost per season, drip line wins hands down for gardens and landscapes lasting longer than three years. If you’ve got bad or sandy water, no system will survive without a decent filter. This is usually missed until that sad mid-July moment you realize half your strawberries are thirsty because algae clogged up every outlet. Always add a filter, no matter which system you choose.
Rodents, roots, careless dogs—every system faces sabotage at some point. Drip line is easier to repair (just cut and clamp with standard couplers) while drip tape is often a junk-it-and-forget-it situation. For peace of mind, consider snake-style layouts for both systems so repair sections are shorter, not running under concrete or decks where extraction means breaking a sweat. If you want to monitor your water use, stick a cheap in-line water meter before your zones. Tracking how much you actually use can turn into serious savings on big gardens and helps catch leaks sooner than waiting for wilting leaves.

Choosing Right: Tips and Tricks for Maximum Success
No system fits everyone, but a few rules of thumb can save you time and cash before you unravel that first bundle. First up: how long do you want your setup to last? If you’re just getting started or plan to reconfigure each year, drip tape is low-commitment. But keep extra on hand, and lay out lines in straight, gentle runs to avoid kinks and heartbreak. Give thought to emitter spacing—tapes often come pre-spaced (every 8, 12, or 16 inches is common), so buy the type matching your plant layout. Vegetables packed tight? Go for closer spacing. Larger plants like squash? Wider is just fine.
Got permanent beds, hedges, or fruit trees? Invest in quality drip line. Pricey at first, but the convenience stacks up over the years. You control emitter size (from 1 to 8 liters/hour), spacing, and can even punch extra emitters for thirsty plants like tomatoes or blueberries. When ordering, measure carefully—round up to avoid awkward extensions, but don’t buy massive bundles just because the price per foot drops: you’ll lose more to storage damage than you save in bulk.
Water pressure is a beast easily tamed with simple math. Most tape wants pressures in the 6–15 psi range, which rain barrels or gravity tanks hit with no sweat. Drip line loves it higher, usually 15–35 psi, so you might need a booster pump if you’re feeding from low-pressure sources. Top hack: always install a pressure regulator (they cost a few bucks and save your entire setup). Filters are non-negotiable; even “clean” municipal water can carry rust and grit that lead to clogs, and once roots get a foothold in a line, you’re just treading water.
Placement and installation make or break your outcome. Run drip tape under mulch to shield from UV light and stray tools. With drip lines, staking is your friend—secure the line every few feet. This stops it from wandering and keeps water where you want it. Curious about automating? Both systems play well with timers, and a few smart Wi-Fi models let you adjust watering from an app, which is more fun than it should be.
Here’s a checklist that saves time for any setup:
- Always measure your beds or rows before buying—it’s easy to misjudge length.
- Buy at least 5% extra length to cover winding and connection points.
- Use a high-quality filter to protect emitters (cheap Y filters rarely fail).
- Install a pressure regulator: match it to your system’s range.
- Test for leaks before burying or mulching lines.
- Check and flush system every few weeks for consistent flow.
If you’re serious about *drip irrigation*, try pairing systems. Drip lines for your perennials, tape for rotating annuals, all run off the same timer. No one is stopping you from mixing both. There are kits designed exactly for this, and the best gardens are often the mismatched ones, reflecting real-world needs instead of catalog photos.
Last tip—don’t skip mapping your system, even if it’s just a picture on your phone. You’ll thank yourself next January when you’re scratching your head over where that last line went, and which beds got which flow.


